From Your Weekly Stronger · October 12, 2026
This tip and exercise originally appeared in our weekly newsletter. Use them together: take a closer look at one pair of shoes, then practice a small foot-strength skill.
Tip: Look beyond shoe size
Dr. Aaron Horschig of Squat University emphasizes three often-overlooked features: toe-box shape, heel elevation, and the upward curve at the toes. His preference for everyday footwear is a natural foot shape and a flat sole. Here is how those ideas translate into a shoe check, with a few extra details for the gym.
Five features to look for
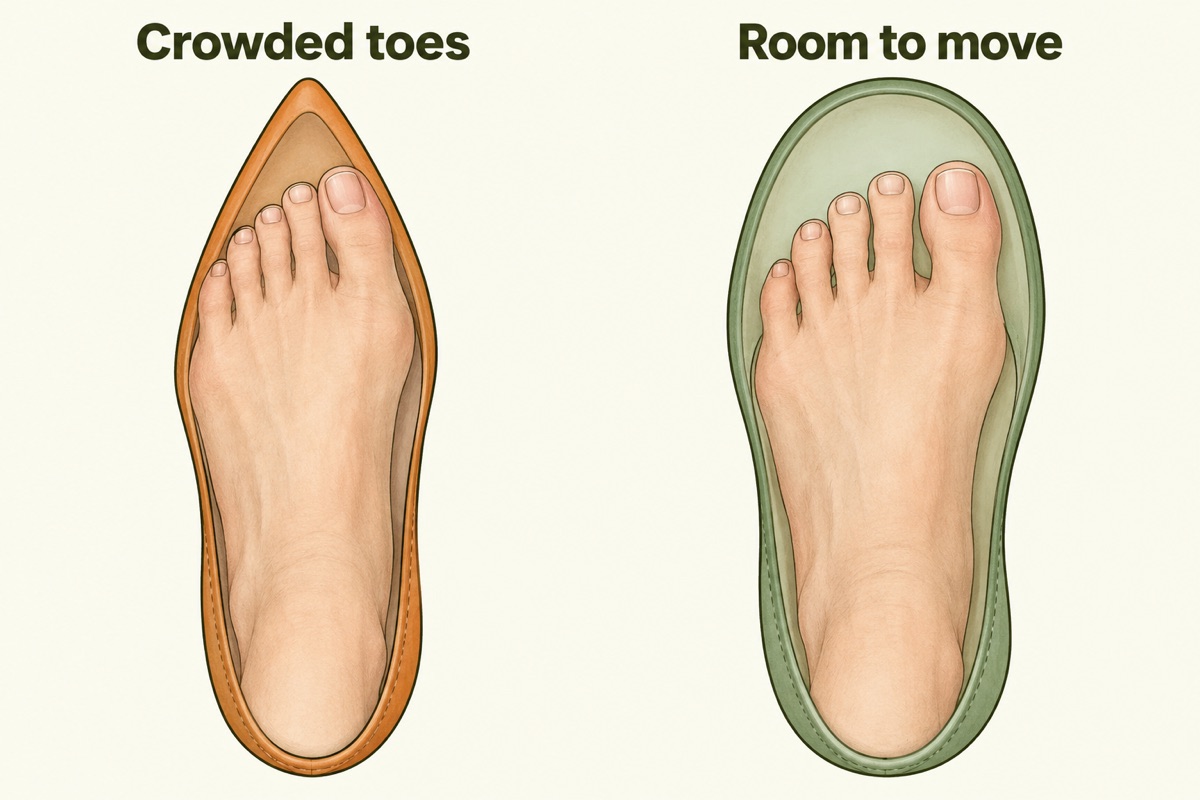
- A wide, foot-shaped toe box. Look for room for your toes to spread instead of a front that tapers to a point. Your heel and midfoot should still feel secure.
- A level heel for everyday wear. Horschig favors zero drop: the heel and forefoot sit at the same height. This describes the height difference, not how thick the whole sole is.
- Little or no toe spring. Look at the shoe from the side. Toe spring is the upward curve at the front; Horschig favors a flatter design that does not hold the toes elevated.
- A flexible, thin sole. These are features of minimalist footwear: less material underfoot and a sole that bends with the foot. Low shoe weight is another feature. Zero drop alone does not make a shoe minimalist.
- A stable base for lifting. Horschig recommends avoiding very soft soles that compress under heavy weights. A sole can bend as you move yet still provide a firm connection to the floor.
Explore Squat University’s three shoe features, his lifting-shoe guide, and the research definition of minimalist footwear.
Your feet have muscles worth training
The small muscles in your feet help support the arches and contribute to balance. In one eight-week study of runners, gradually increasing walking in minimalist shoes strengthened foot muscles, as did targeted exercises. That does not tell us which shoe is best for every older adult. An older-adult study found that adding foot exercises to lower-body training improved foot strength and some balance measures.
Exercise: The seated short-foot exercise
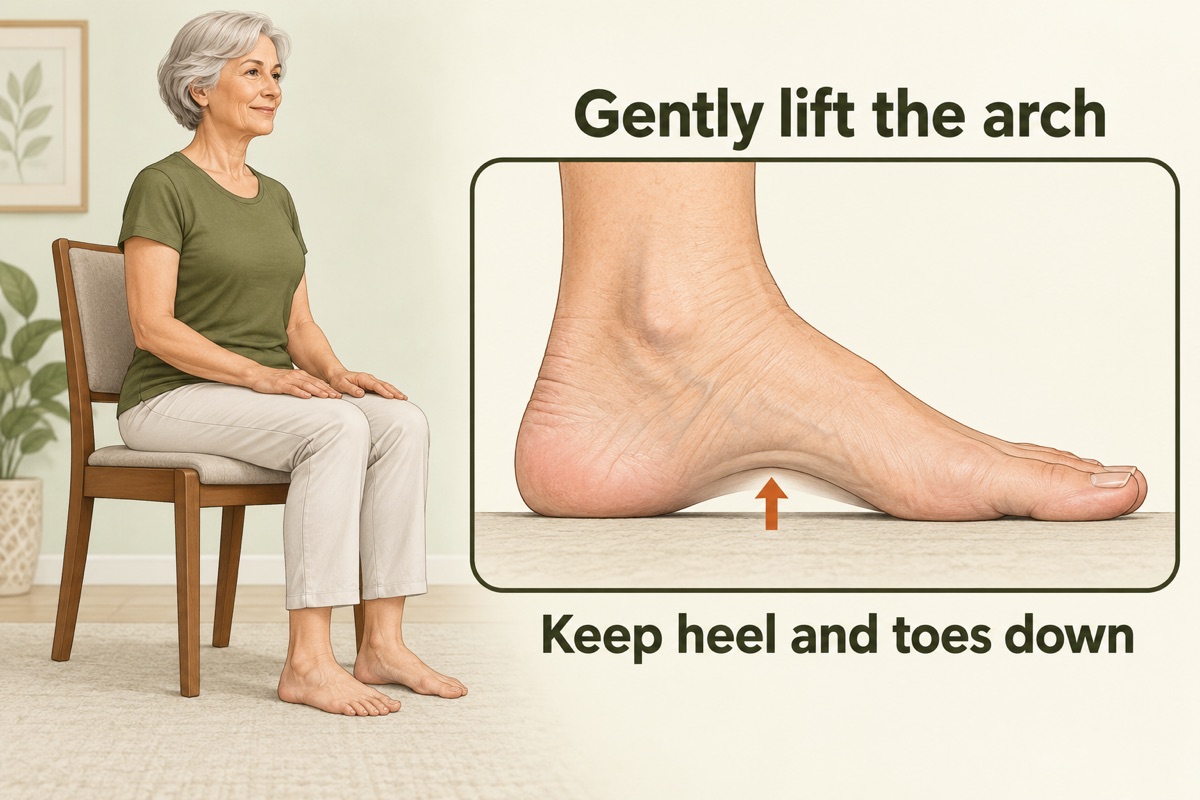
Squat University explains foot stability with a “tripod”: the heel, the ball beneath the big toe, and the ball beneath the little toe. This exercise practices gently lifting the arch while keeping those three points in contact with the floor. Explore Squat University’s explanation.
How to do it
- Sit comfortably. Use a sturdy chair with your knees bent and both feet resting flat on the floor. Start with one foot at a time. Keep protective footwear on if advised by your clinician.
- Find your tripod. Feel the heel and the balls beneath the big and little toes. Keep all three points gently connected to the floor.
- Make a small arch lift. Gently draw the ball of your foot toward your heel without sliding it. Keep your toes long and relaxed; avoid curling them or rolling onto the outside edge.
- Hold, then relax. Keep your heel and forefoot down. Hold the gentle effort for 3–5 seconds, then fully relax. The movement may be very small.
If the movement feels tricky
Start by noticing the three contact points and keeping your toes relaxed. Use less effort and a shorter hold. Ask for a demonstration if you cannot find the movement.
Ready for a little more?
Once the seated version feels easy and controlled, build gradually toward 8–10 gentle holds. Your trainer can help you decide when to practice with more weight through the foot.
Check one pair. Practice one skill.
Inspect one pair using the five features above, and practice the seated exercise on three days. If trying a less supportive or lower-drop shoe, follow Squat University’s advice to transition gradually: begin with short, comfortable periods and build according to your response. Give your feet and calves time to adapt.
Bring your questions to your next session
Bring your training shoes and foot-strength questions to your next visit. Explore personal training at Saddlebrooke Strength or schedule a free introductory call.